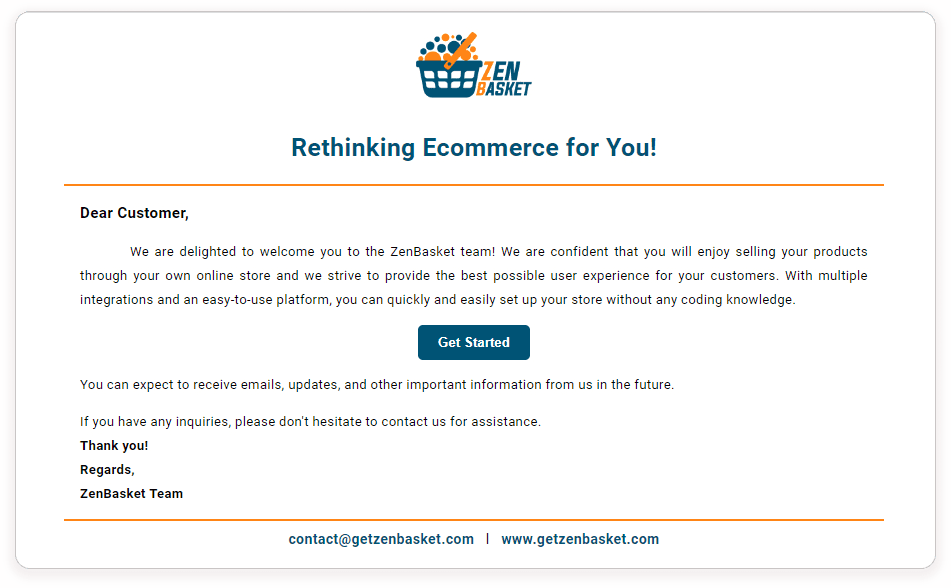
If you're a business owner or an individual looking to create an online store but don't have any technical knowledge, ZenBasket is the perfect ecommerce platform for you. With its user-friendly interface, you can create a professional-looking online store in no time. In this guide, we'll take you through the simple steps of setting up your ZenBasket account and building your online store, making the process hassle-free and straightforward.
Get started today and bring your business online with these simple steps:
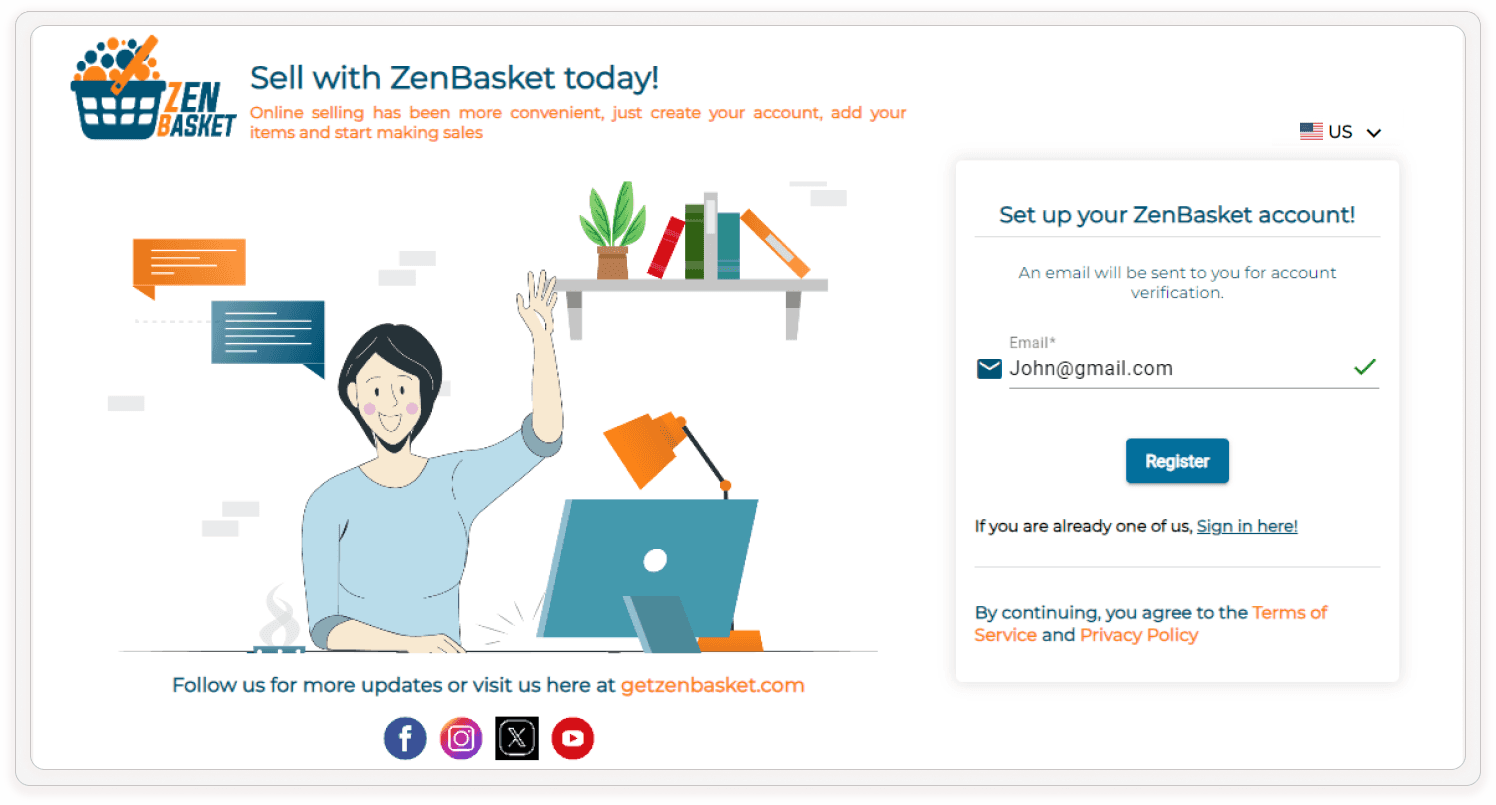
1. Sign Up for an Account
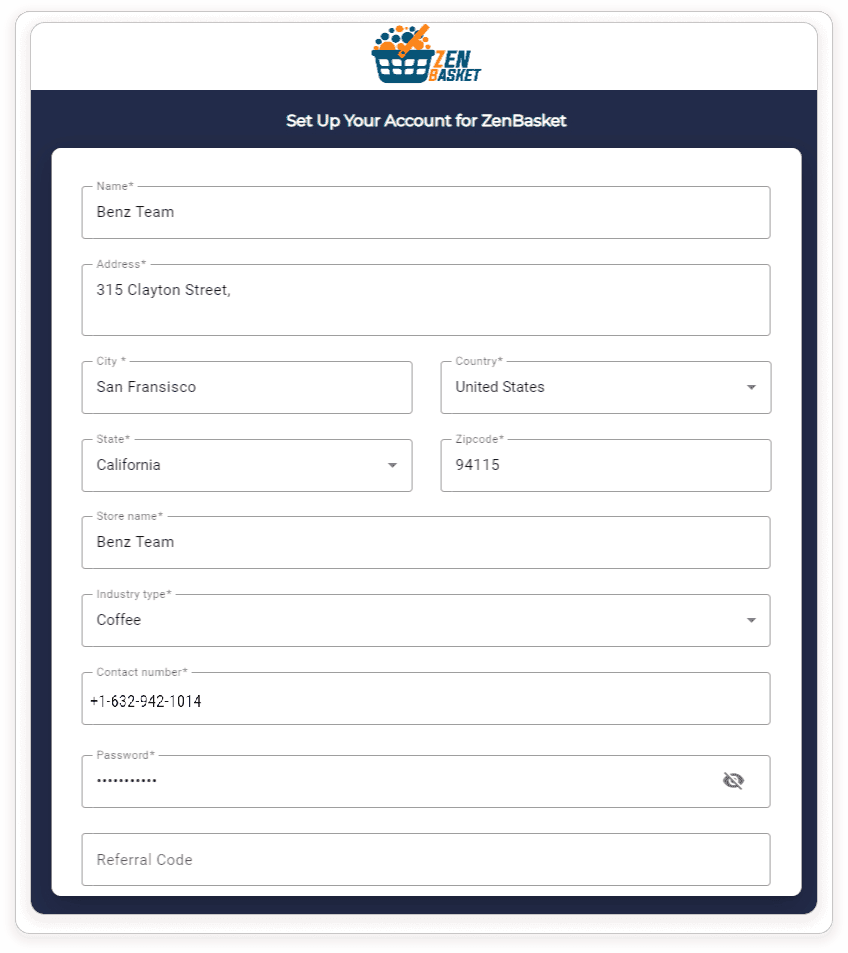
Get started quickly and easily! Visit https://dashboard.getzenbasket.com/signup and enter your business email address for your store. Click the "Register" button to start your exciting ecommerce journey.
2. Verification Through Email
ZenBasket prioritizes security. After registering, they'll send a verification email containing a link. Click on the link to complete your account setup and unlock the full functionality of your online store, allowing you to manage products, orders, and customers with ease.
3. Set Up Your Store
Provide essential details like your store name, contact information, address, and other relevant business information. Choose a subdomain that aligns with your brand and becomes your unique web address. This subdomain should be memorable and easy to spell, reflecting your brand essence, for optimal recognition.
4. Select Your Ideal Plan
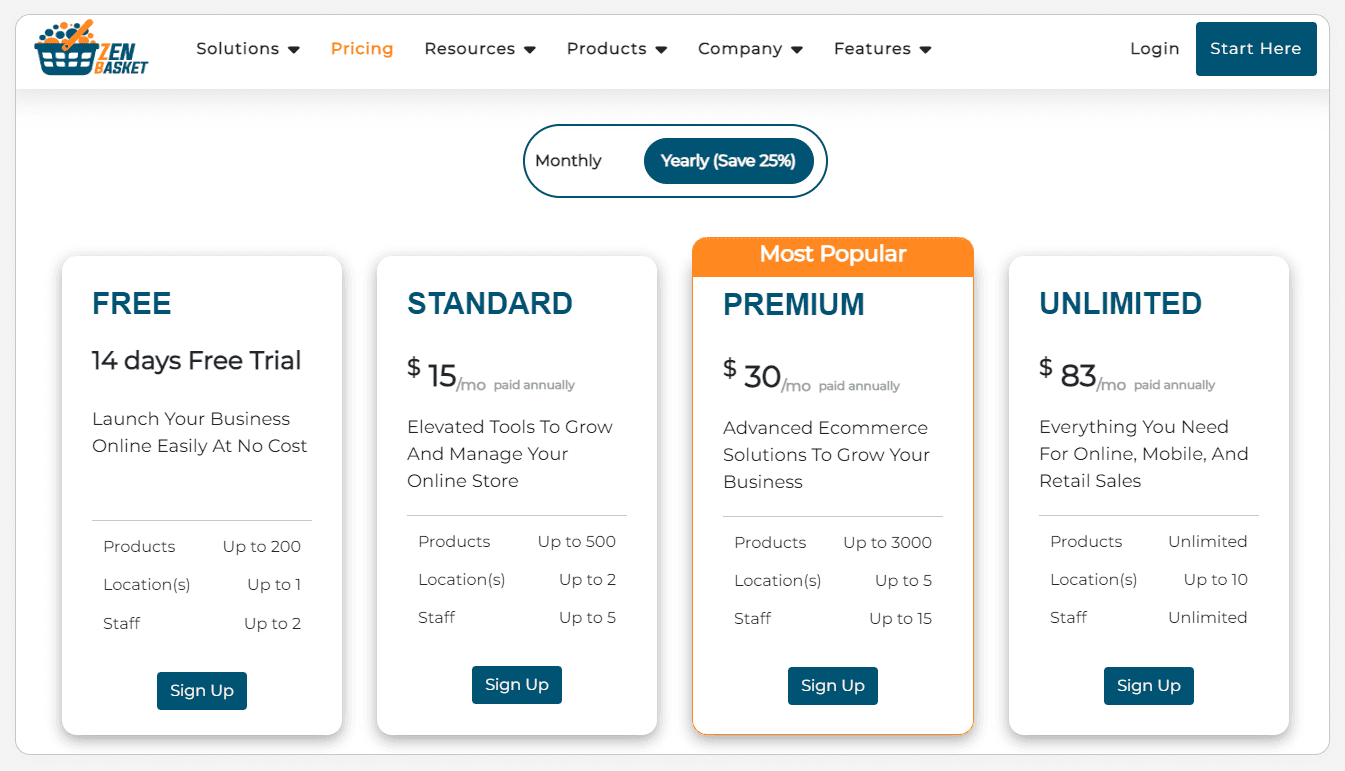
ZenBasket caters to businesses of all sizes! We offer a variety of subscription plans to fit your specific needs and budget, from a free trial to premium options. Explore the available plans to find the one that best aligns with your current business goals, such as the number of products you plan to sell, the storage capacity required, and the marketing tools you desire.
5. Customize Your Store
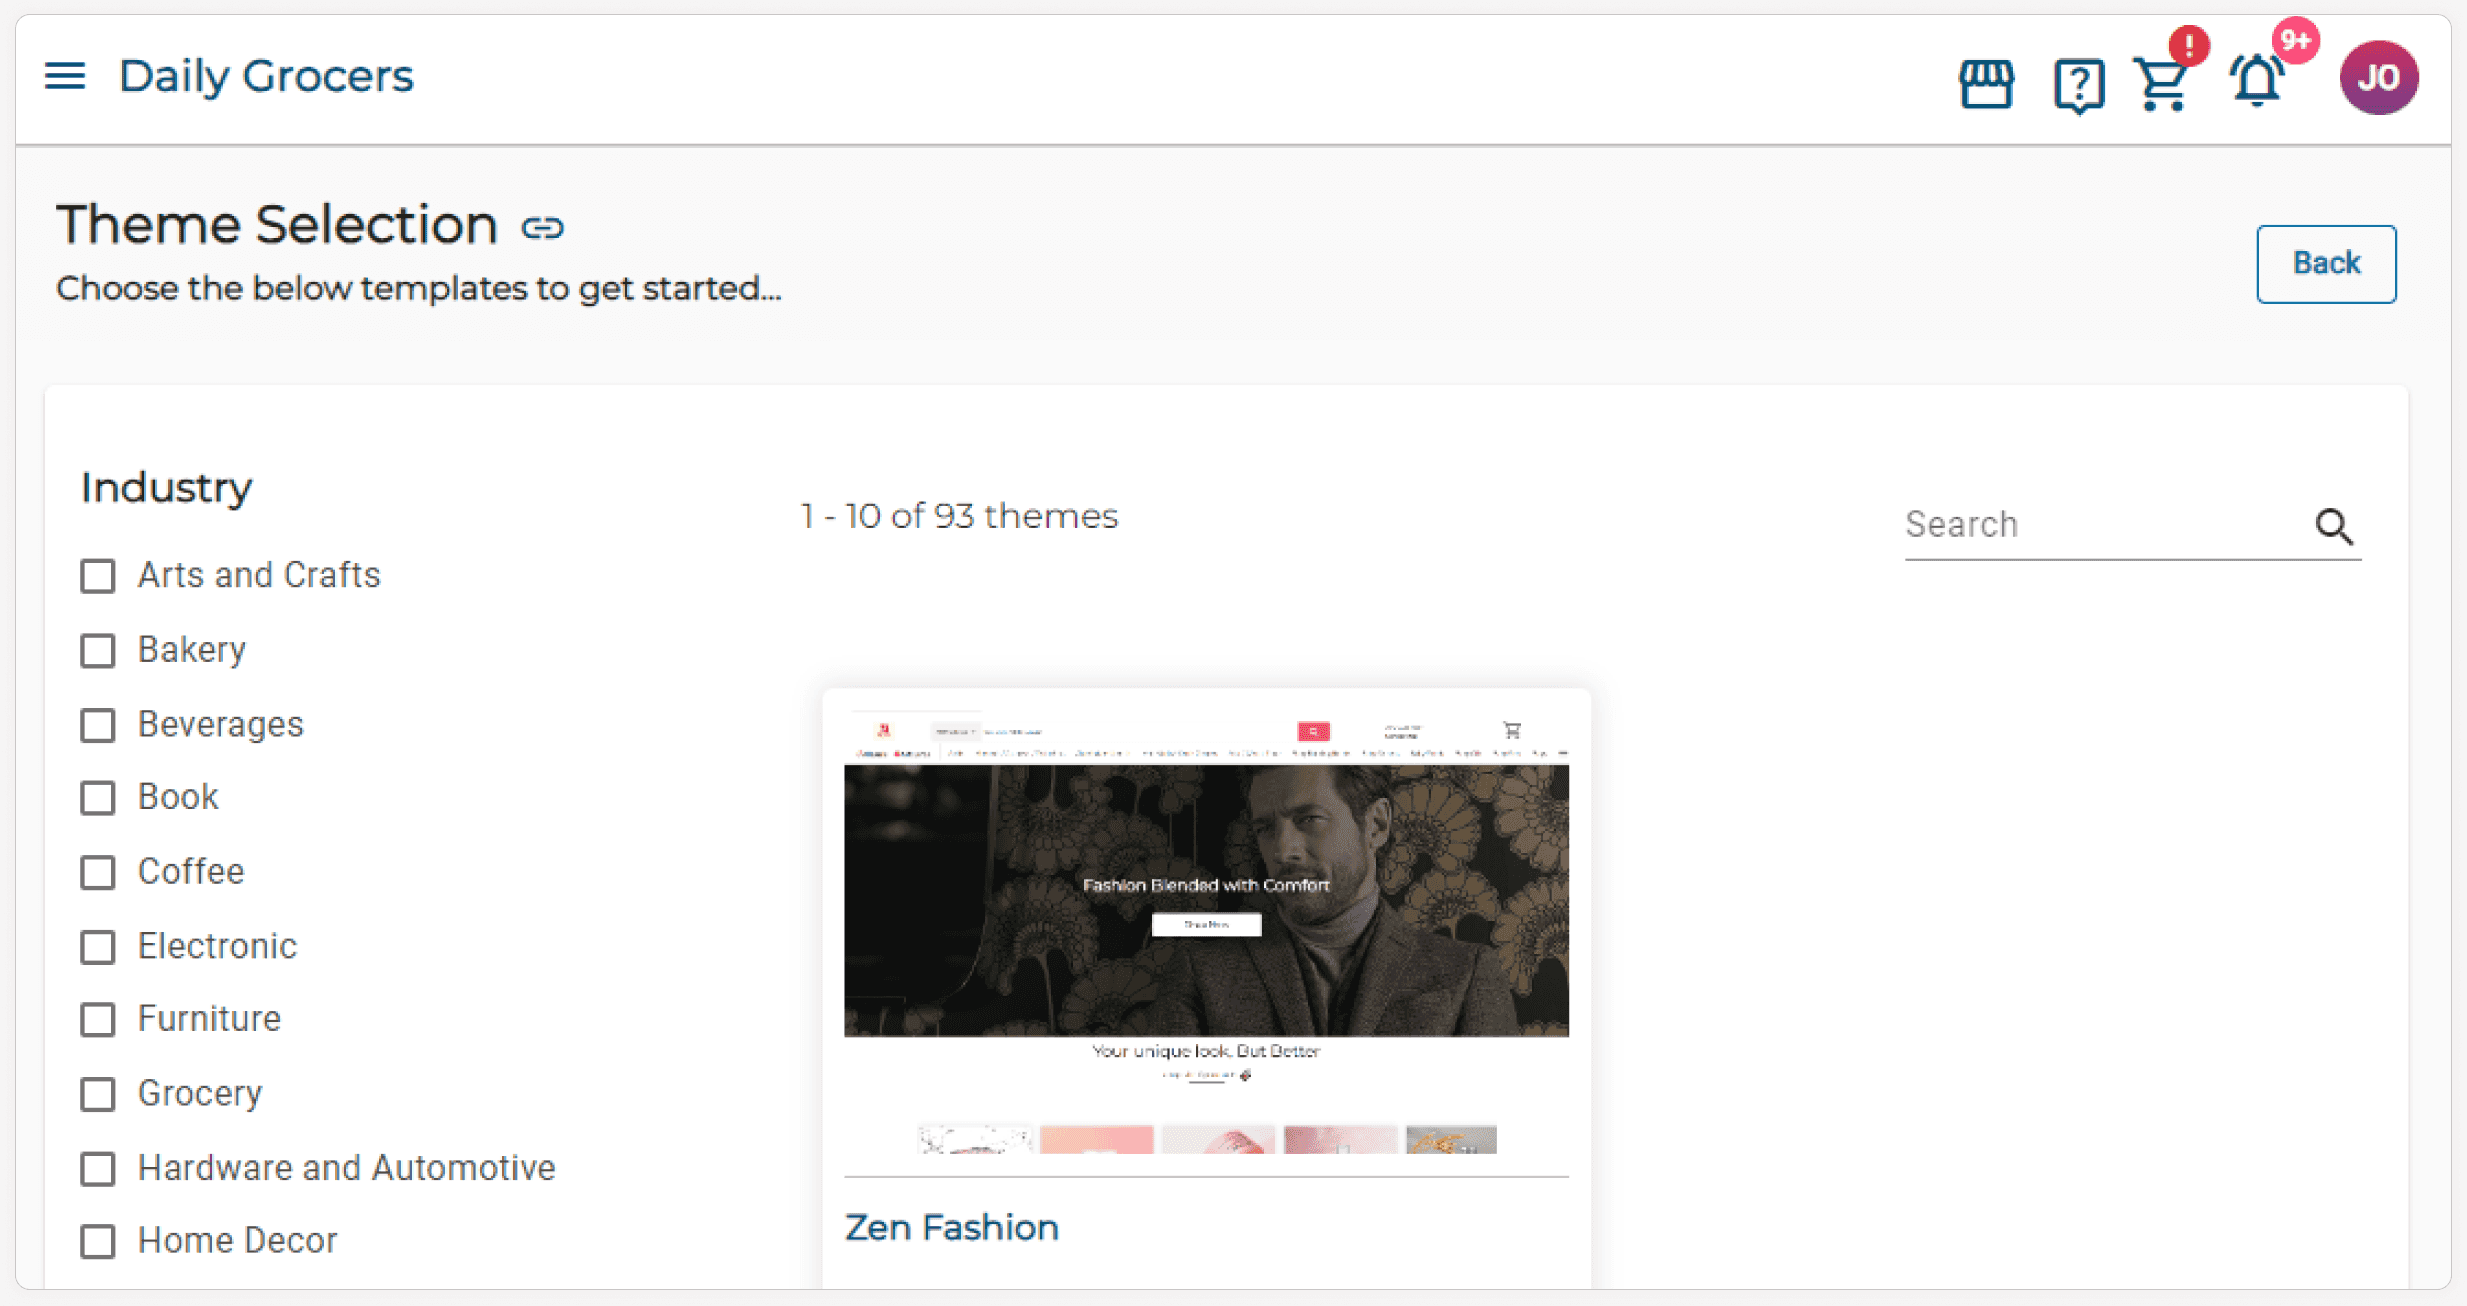
Make your store your own! After setting up your account, you can start customizing your store on ZenBasket. Choose from a variety of customizable themes to give your store a unique look and feel.
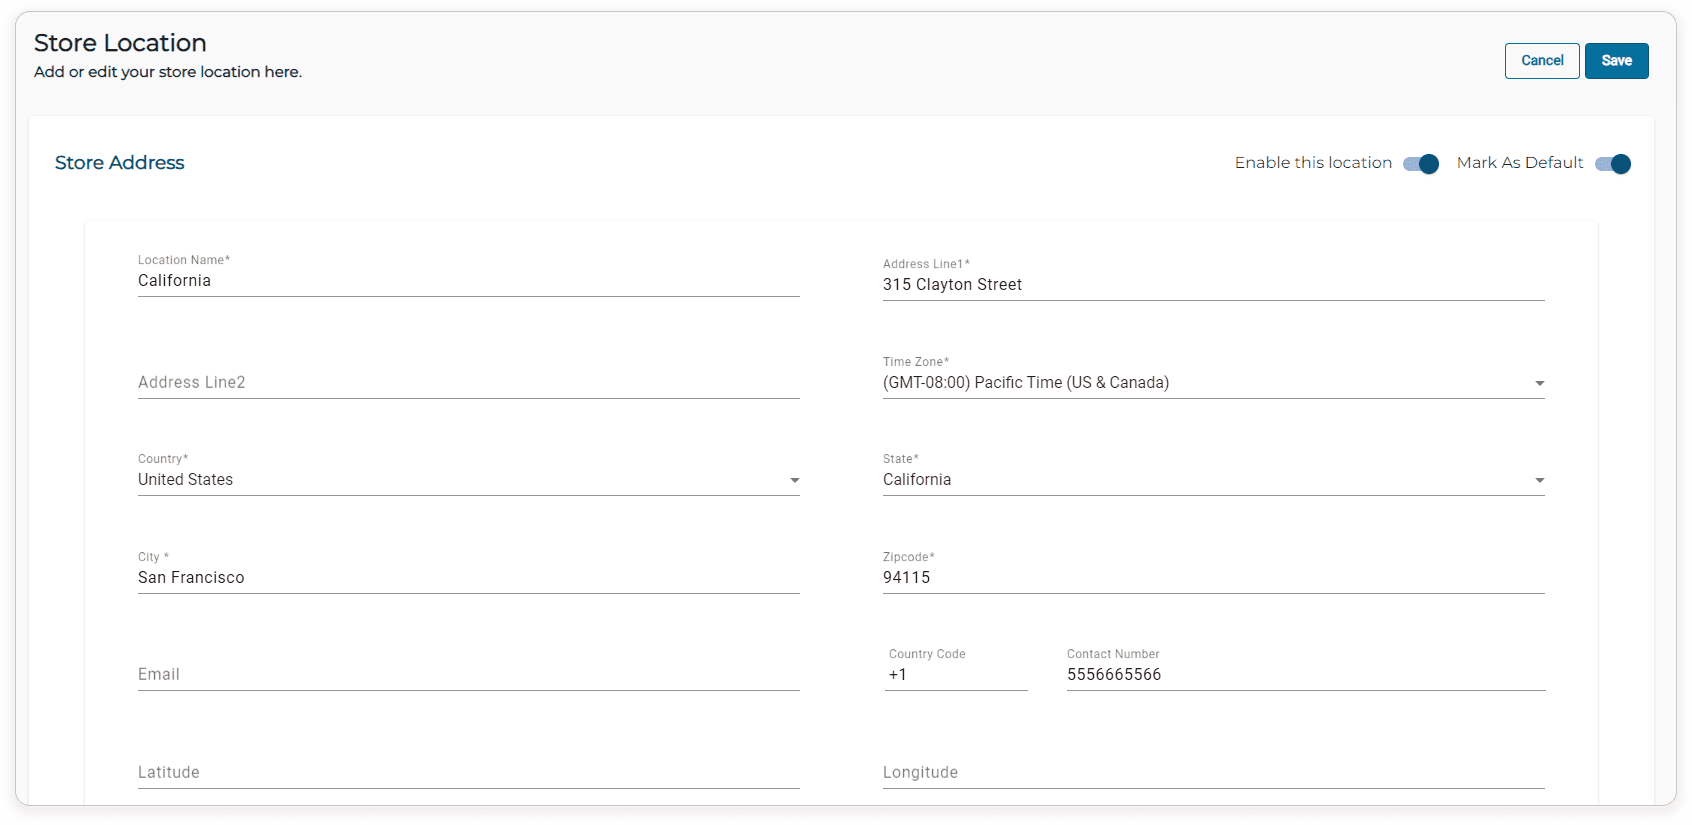
6. Define Your Store Location
Let your customers find you! After selecting your theme, click "Add Location" to create a new store location. Enter details like your store name, address, contact information, and business hours to ensure your customers can easily find and connect with you. This transparency builds trust and encourages customers to shop at your store.
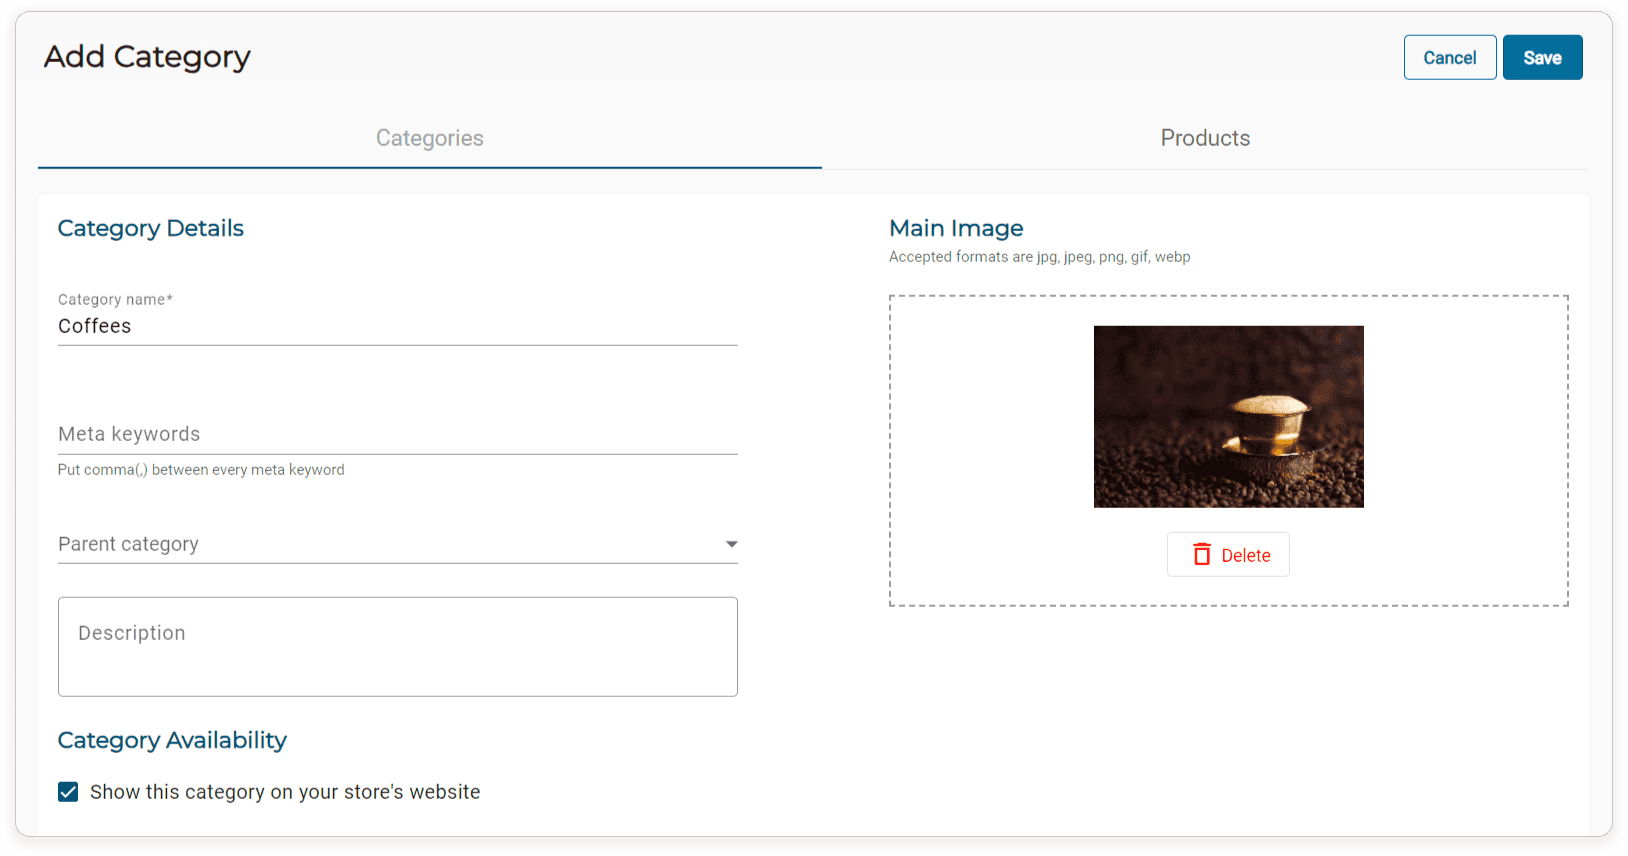
7. Categorize Your Product
Make it easy for customers to find what they're looking for! Create clear and concise categories that accurately reflect your product offerings. Click on "Add Category" on the Categories page and provide a name, parent category (if applicable), a descriptive yet concise description, and an image to visually represent the category.
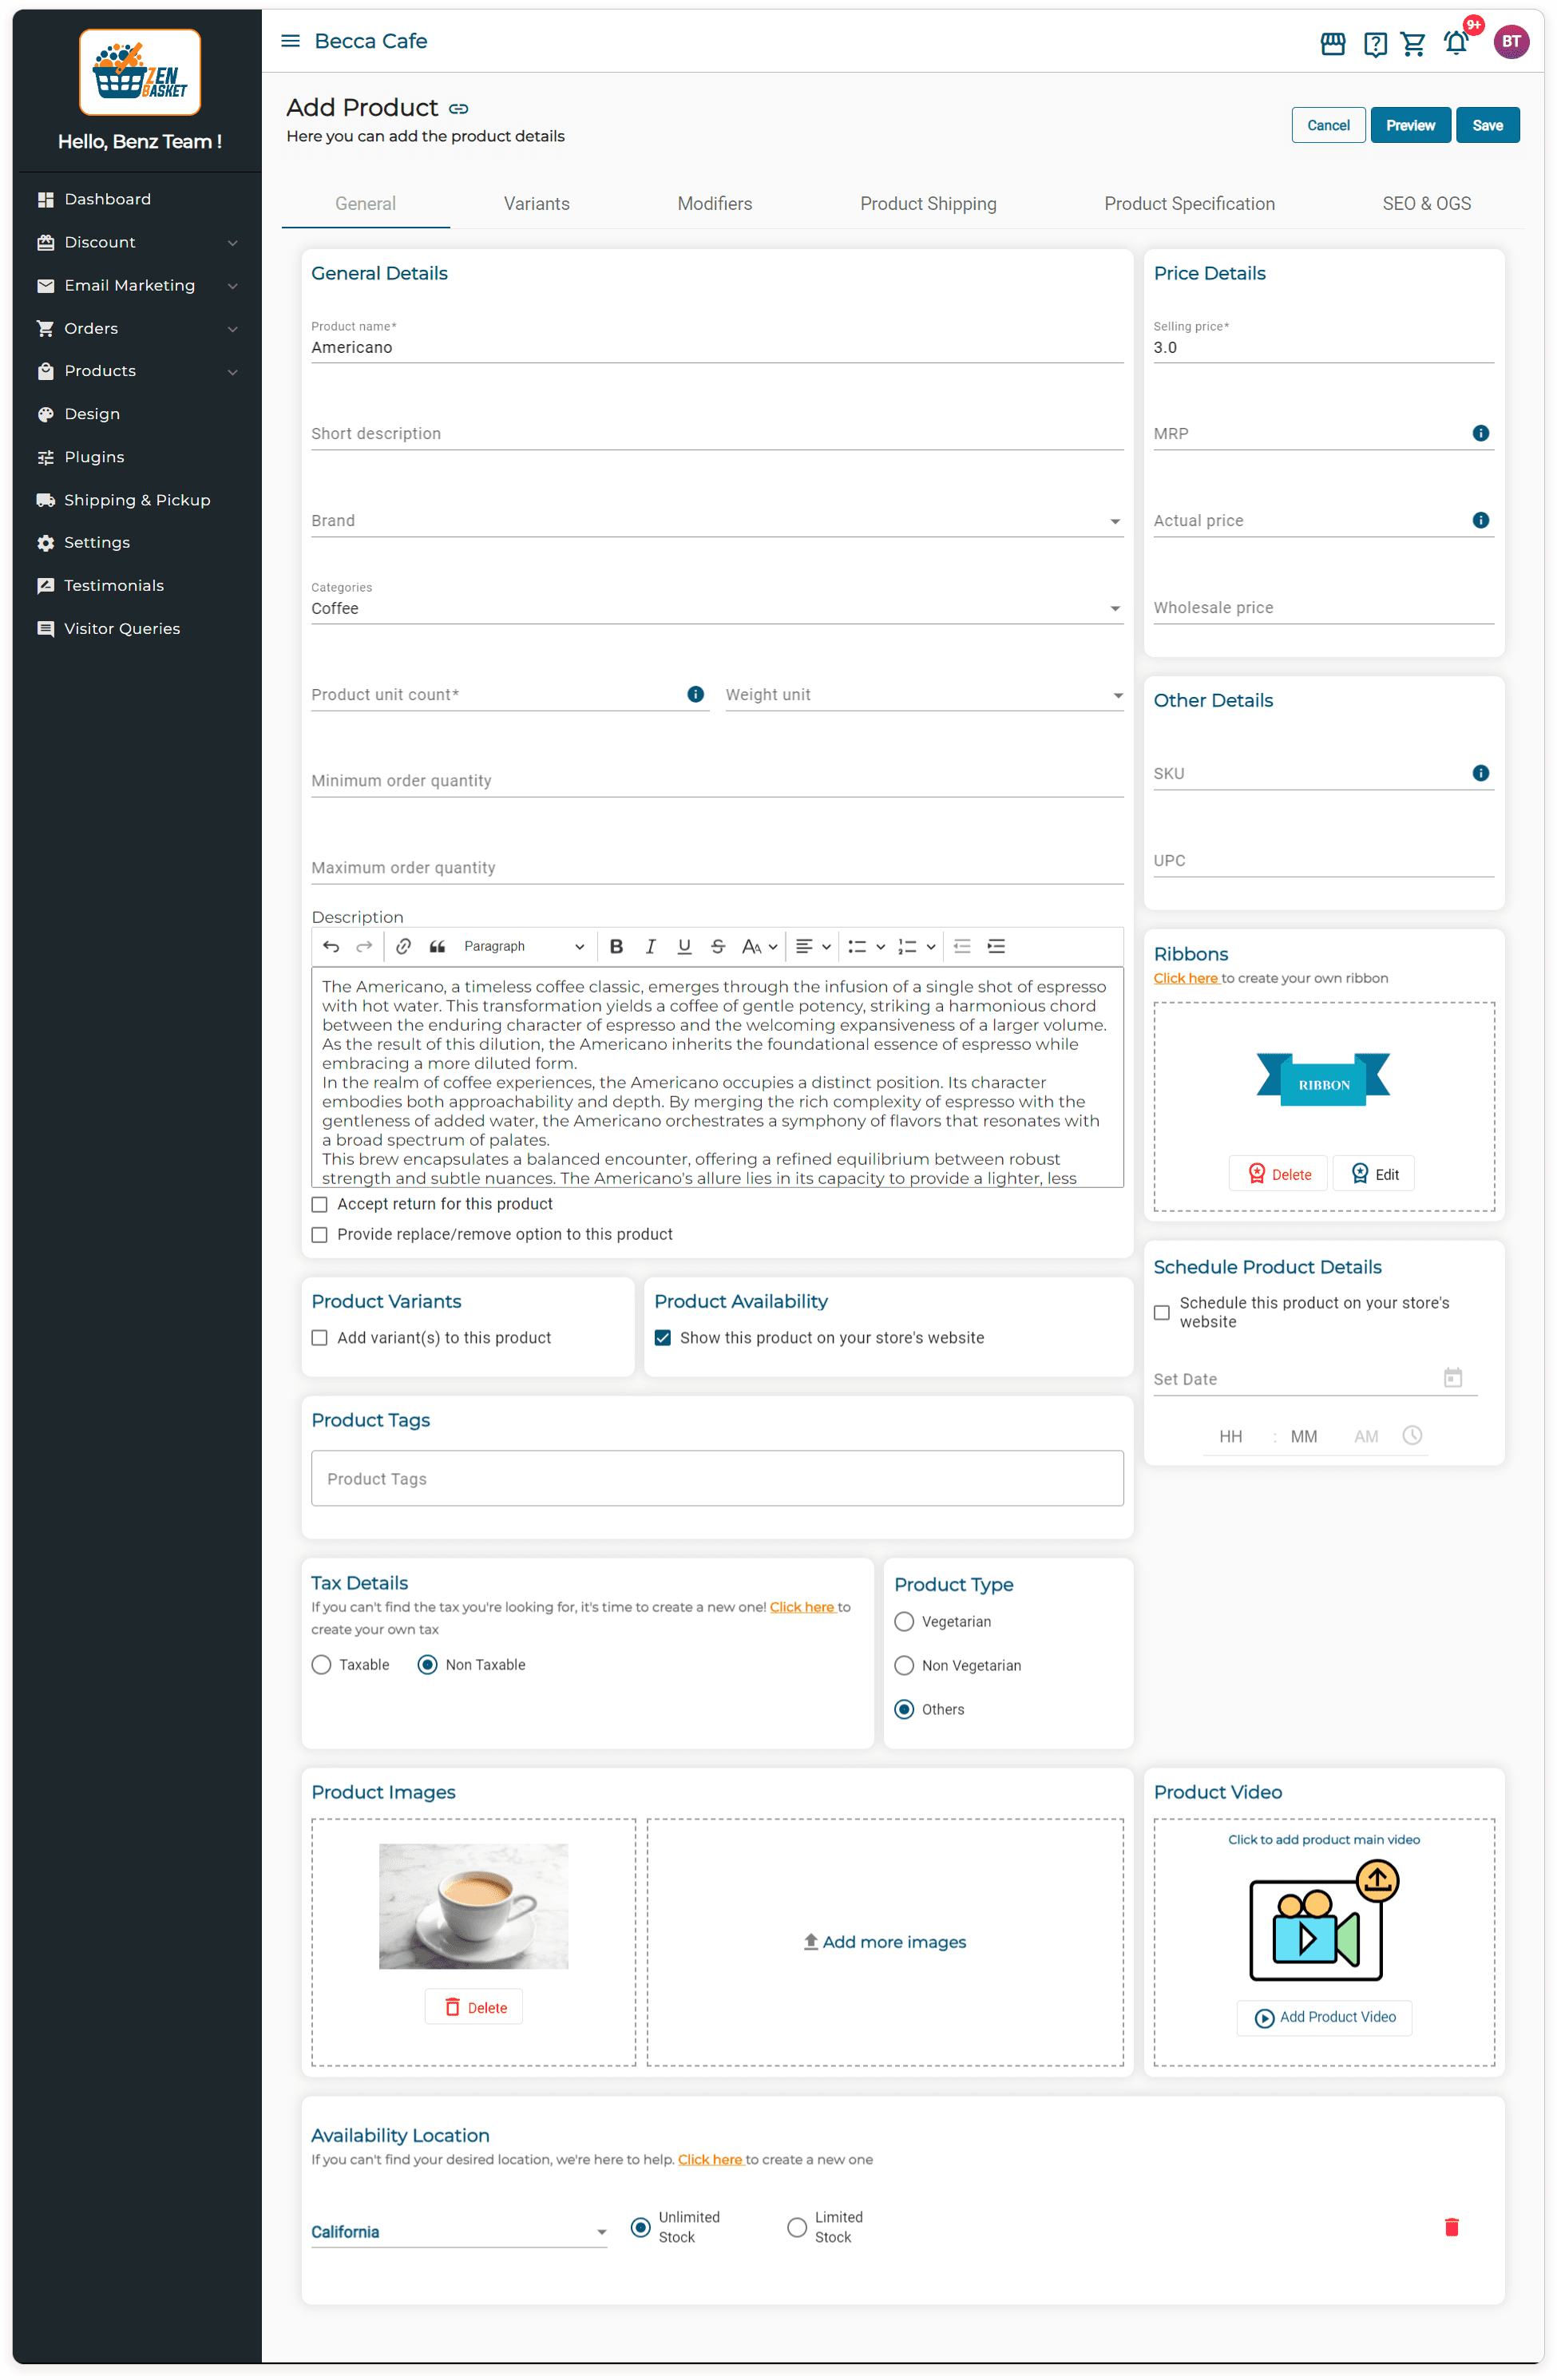
8. Add Your Products
Once your categories are set up, it's time to showcase your amazing products! Click on "Add Product" in the Products menu and provide comprehensive product details to entice potential customers. Write compelling product descriptions that highlight features, benefits, and specifications. Consider including size charts, material information, care instructions, and warranty details when relevant. Don't forget high-quality product photos and videos that showcase your products from multiple angles and in good lighting. Remember, high-quality visuals can significantly impact buying decisions. Customers want to see exactly what they're purchasing, so invest in professional photography or take your own high-quality pictures with a good camera and plenty of natural light.
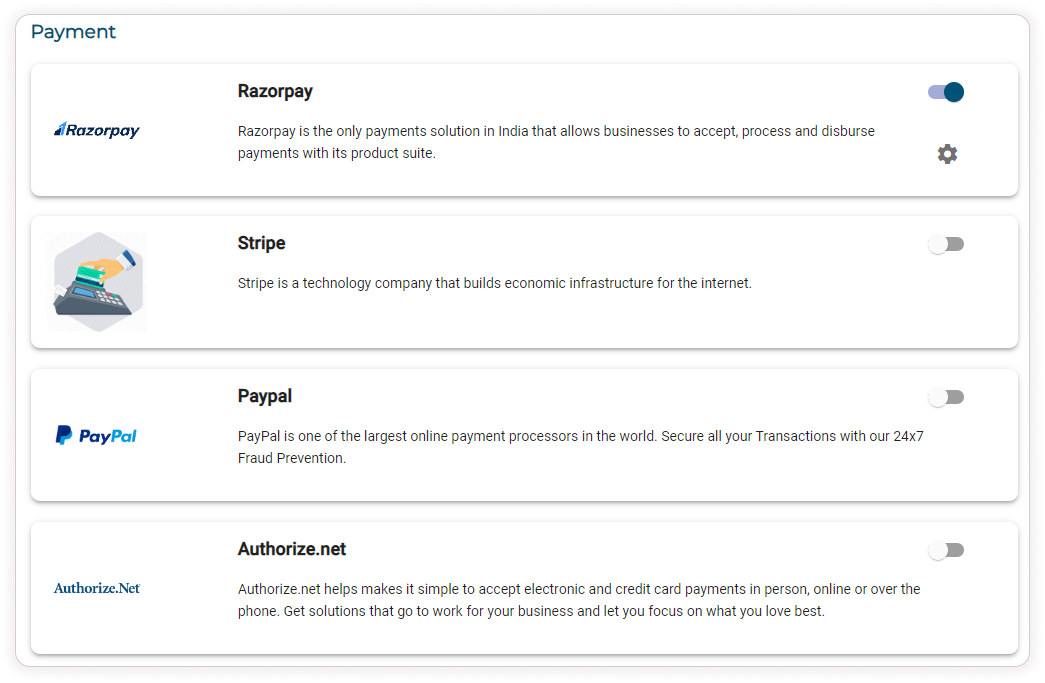
9. Payment and Shipping Integration
Ensure a smooth checkout experience for your customers by integrating secure payment gateways like PayPal, Razorpay, Stripe, etc. You can find details on integrating these options on the Payment page in Settings.
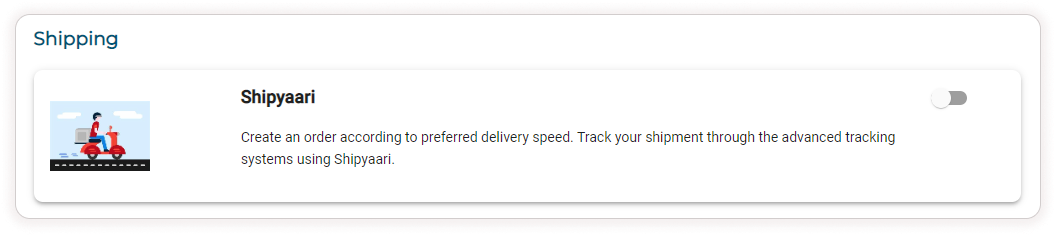
Additionally, configure shipping plugins like Shippo or Shipyaari to manage deliveries efficiently. Details on setting up shipping options can be found on the Shipping page in Settings. By offering a variety of trusted payment methods and efficient shipping options, you'll increase customer confidence and encourage them to complete their purchases.
10. Launch Your Store with Confidence
Once everything is set up, and tested thoroughly to ensure proper functionality, and you're satisfied with your online store's appearance, it's launch time! ZenBasket's user-friendly interface makes launching your store a breeze. With just a few clicks, your online store will be live and ready for business. But remember, your work isn't quite done yet! Explore ZenBasket's built-in marketing tools and consider additional marketing strategies like social media marketing and search engine optimization (SEO) to attract customers and propel your online sales to new heights.
Conclusion
In conclusion, ZenBasket empowers anyone to create a professional-looking online store and unlock the exciting world of ecommerce. With ZenBasket's intuitive interface, you don't need any technical knowledge to get started. Remember, building a successful online store goes beyond the launch. So, take the first step today and turn your entrepreneurial dreams into reality with ZenBasket!